


Dress up your boring tray ceiling with these easy wood beams!
These wood beams are an easy way to give some character to your tray ceiling. I also painted our ceiling to add to the cozy feel.
This beam project is one of my favorite DIYs in this house so far! I work with Minwax occasionally and this project is another one I accomplished using their awesome products.
Our master has ten foot ceilings thanks to the tray ceiling. This is how the room looked after I installed the new bamboo chandelier in this room:

This post may contain affiliate links for your convenience.
I may earn a small commission when you make a purchase through links.
See my policies and disclosure page for more information.
It has changed so much since then! These beams and the painted ceiling added so much warmth to this space.
When I see a tray ceiling I see a potential project! I've seen many treatments on these types of ceilings, from adding crown to installing wood to the tray part.
This was a different take on the typical tray ceiling treatment and we LOVE how it turned out!
I had help with the first part of this project and because of that I did the steps a little backwards. I would have much preferred to paint the ceiling and then stain the wood after, but because I was at the mercy of someone else's schedule, I did the steps the opposite way I would typically recommend. More on that in a bit!
The goal was to create "beams" around the sides of the tray ceiling. We had two options — take the wood and 45 it on the table saw so when we nailed the side and bottom together, it would look like a true beam.
Or, take the two pieces of wood and just nail them into each other to create the look of a beam. You'll see the seam where they meet, so it doesn't look quite as authentic.
We went with the latter, mostly because we were using very long pieces of wood — two at ten feet and two at 16 feet. I don't trust that the mitered corners would have met up perfectly at those lengths.
I'm glad we didn't go that direction. It would have been WAY more work and the final result looks great without that extra step.
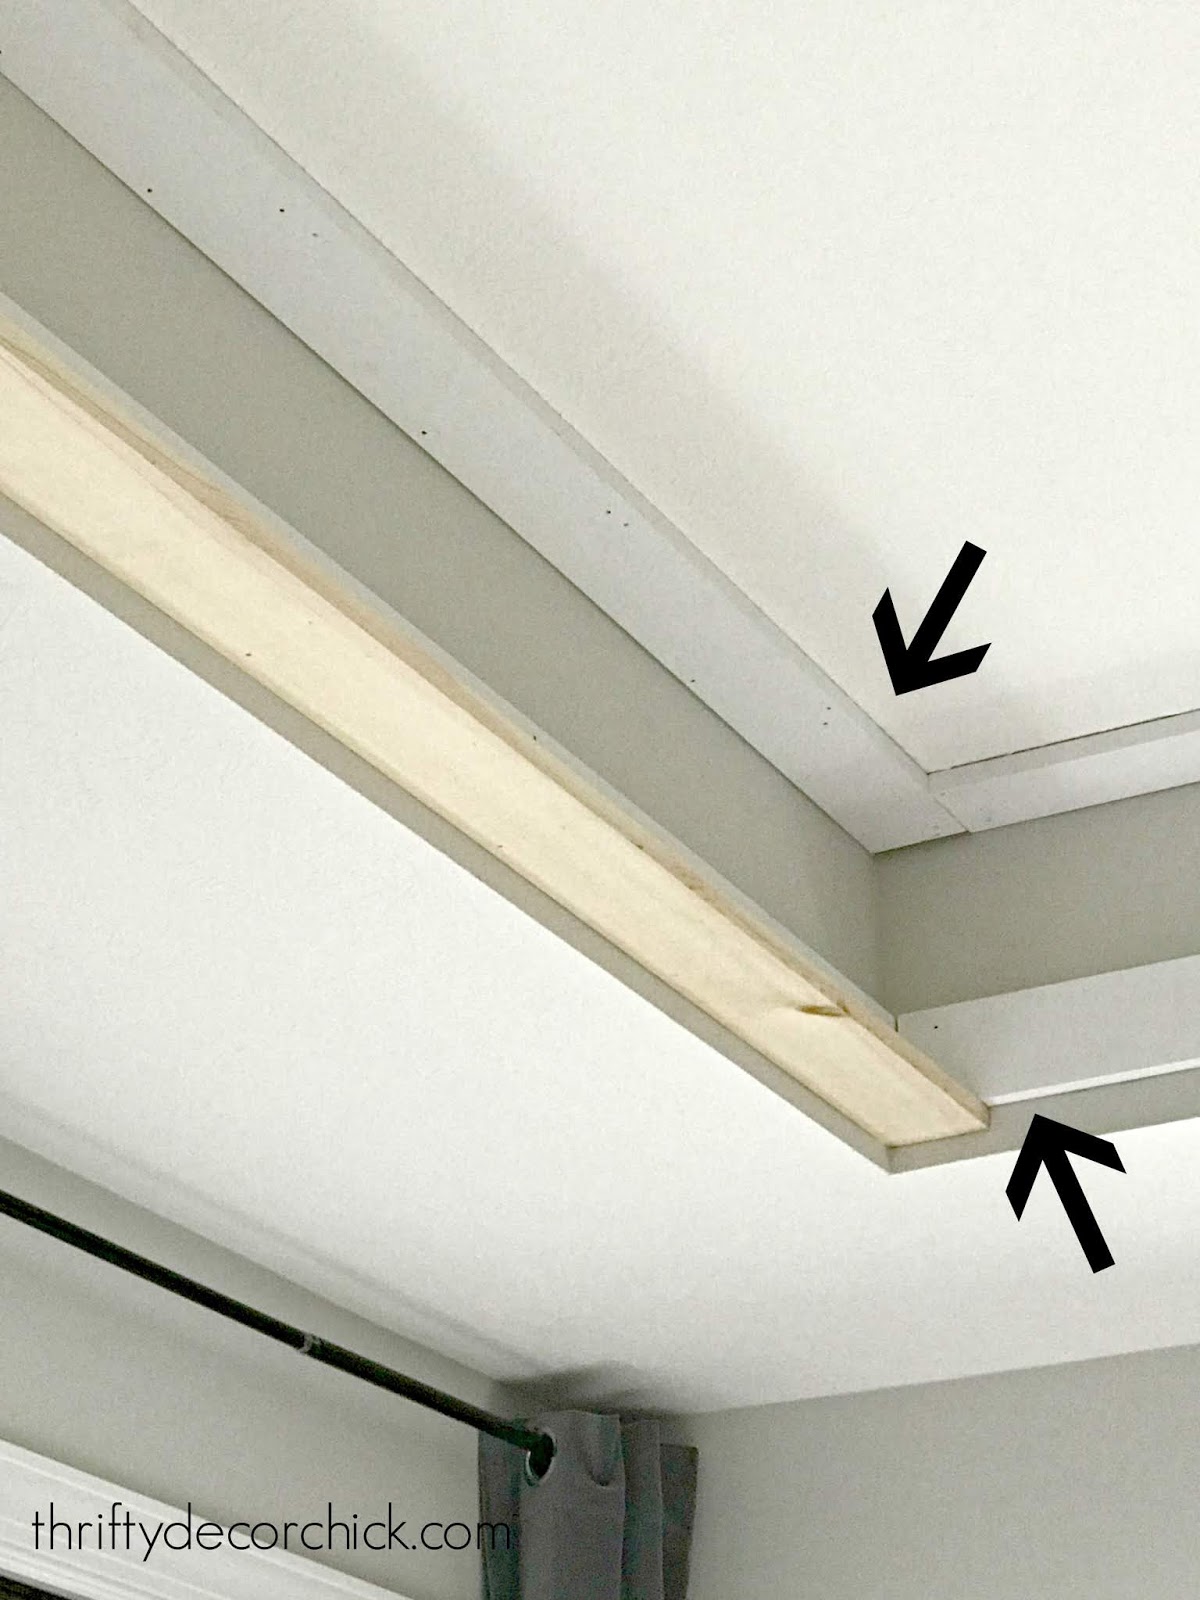
Add your supports to the ceiling and wall
To start, you'll need something to attach your wood to. The wood "beams" are only two sides — the bottom and the side.
So the piece on the ceiling (be sure to attach to studs) was there to stabilize the side board, and the wood attached to the side of the tray ceiling was there to hold the bottom piece in:
