


Review of Home Depot's Lifeproof LVP flooring in dusk cherry.
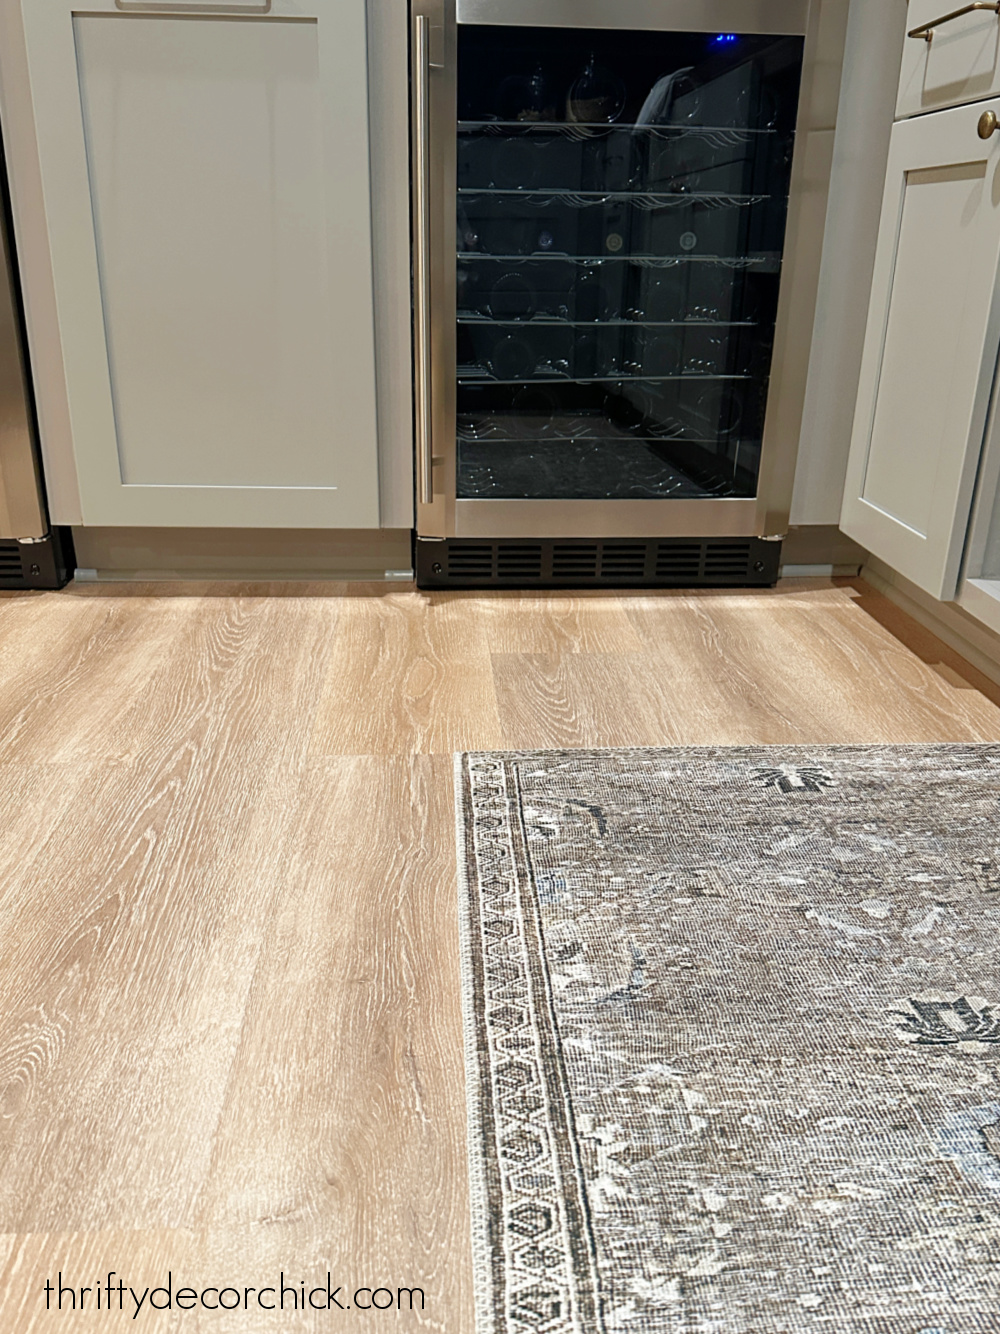
After more than five years, we finally have flooring in our basement kitchenette! When we moved in, I figured we'd finish out that space sooner than later, so I didn't have the carpet extended to that area.
I had big goals to add the flooring right away, but that did not happen. Here we are five years later. 🙂
First of all, I should have known better — it takes me forever to research and decide on big purchases like this.
Also, I didn't consider that flooring should be installed after base cabinets. So that spot has sat with cement and scrap carpet since we moved in.
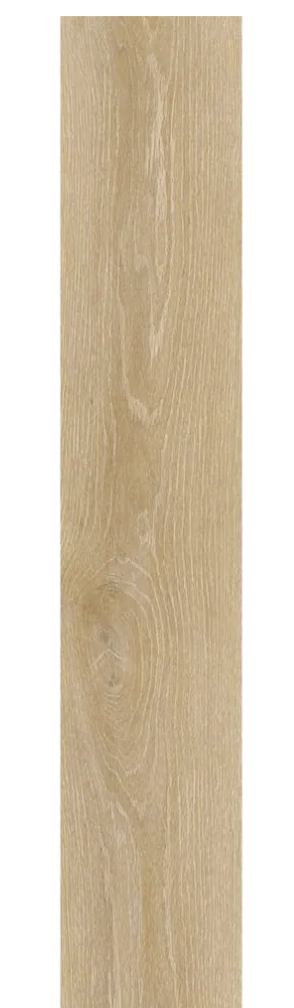
Years ago I saw this LVP flooring at Home Depot and fell in love with the Dusk Cherry color:
This post may contain affiliate links for your convenience.
I may earn a small commission when you make a purchase through links.
See my policies and disclosure page for more information.
The Lifeproof luxury vinyl plank flooring (LVP) I picked is perfect for a basement, or anywhere you may have water issues. They are waterproof and are incredibly easy to clean.
I've had the little sample of this flooring for YEARS (I actually used it as a coaster on my desk to see how it would hold up to water!) and it was finally time to purchase it last fall when we started on this kitchenette.
There are so many great tutorials online on how to install click lock LVP flooring, so I'll share the resource I used. Instead of a step-by-step instruction, I want to share some tips about the installation and our thoughts after we've lived with this flooring for awhile.
Important details about this Lifeproof LVP flooring:
- Each plank is about eight inches wide and four feet long and covers 20 sq. ft. per carton.
- This flooring is scratch and stain resistant.
- It is 100 percent waterproof. (Great option for pet owners!)
- The planks can be installed over existing tile, hardwoods, etc.
- No acclimation required. (This is huge! You can start installing right away.)
- There are a ton of color options.
This flooring isn't difficult to install…as far as actually laying the flooring and clicking them together. Once you get going it goes quite fast and gets much easier.
Physically it isn't the easiest DIY project — but all flooring is hard on the body in my opinion. I'm getting old! 😂
I watched this helpful Youtube video before starting the install. They share some great tips that answered a lot of my questions!
Before I started anything, I scraped the concrete floor to remove any plaster or paint splatters from the building process.
Once I got that cleaned up, I started in the left corner of the room with my first plank.
Starting at the left is important because of the tongue and groove location on this flooring!
Your planks will not click together easily if you start at any other spot.
You can use a regular miter saw or to cut this flooring (or use a razor to score and snap it), but I was able to borrow one of these vinyl flooring cutters:
