


How to refinish a wood table with water stains and damage.
I turned our water-stained wood dining table into a gorgeous piece that is protected against food and liquid!

If you have a real wood piece of furniture that has stains from food and drinks, this tutorial will help you bring it back to life. I’m SO pleased at how this ended up!
We got our dining table years ago at a local store in Indy called Urban Underpriced. I loved that it had a solid wood top, not just veneer. The wood planks have all the knots and imperfections that I think gives furniture character.
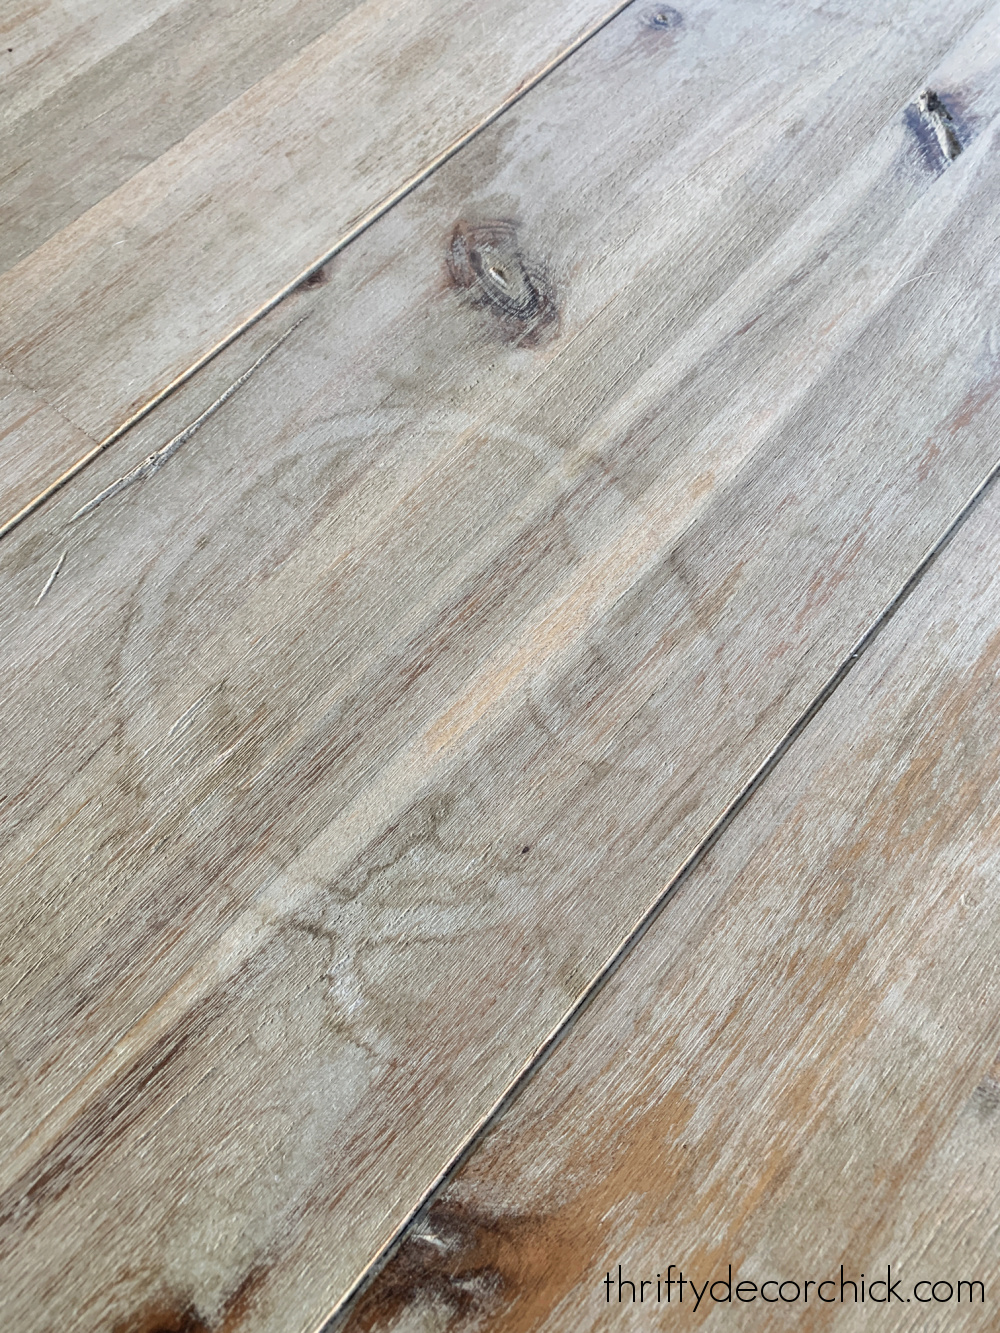
Unfortunately, we quickly realized there was little to no protective coat on the tabletop. At first it didn’t bother me much, but after five years the stains were all over:
This post may contain affiliate links for your convenience.
I may earn a small commission when you make a purchase through links.
See my policies and disclosure page for more information.
We also had wine stains, oil marks and even some nail polish remover:

It was a mess!
I finally got to it a few weeks ago and the refinishing process went so smoothly, I was kicking myself for waiting so long!
Why does a project go so easily when I think it will be time consuming, and take forever when I think it will be a few minutes?? Every. time.
1. Sand down imperfections and water spots
Before sanding, I wiped down the table well. You want to make sure there’s no residue on the surface that might gum up the sanding pad.
If you have any stuck food, use a putty knife to remove it before sanding.
I used my cordless orbital sander for this job — I’ve gone to battery-operated for almost all of my tools now, and they make DIY so much easier!:

The orbital sander has a round sanding area that speeds up the process.
I used to have problems with these sanders leaving skip marks — it would drive me crazy! After all that work, seeing those little imperfections was so frustrating.
I figured out the cause of those skip marks were from pushing too hard on the sander. If you let it do it’s job, the process is much quicker and easier!
Here are some basic tips for using an orbital sander:
- Start with a coarse grit sandpaper (I started with 80) and move to finer one (120 grit) for your last pass.
- Let the sander do the work! Do not press hard on it or you will get the dreaded those skip marks. Let it glide across the surface, and only add a bit more pressure on problem areas.
- Sand with the grain of the wood.
- Place the sander on the surface and then turn it on. When you start sanding while it’s running, you might damage the wood or get the marks I was talking about.
- Empty the dust collector often to keep the dust in the air to a minimum.
I was pleasantly surprised at how little dust settled nearby. I had to wipe down a few things, but overall the collector attached to the sander does a great job.
That oil mark pictured above took a few more passes than the rest of the table, and I had to add a little pressure while working on that spot. I like to tilt the sander just a bit so I can use the edge of the pad on problem spots like this.
2. Clean your surface well after sanding
After you’re done sanding, you’ll want to do a good cleaning to remove all of the dust before staining or treating the wood surface.
I vacuumed first, focusing on the grooves between the planks:

A tack cloth is the best way to remove the remaining dust, because it’s sticky surface grabs everything, but isn’t wet.
I didn’t have one handy, so I used a microfiber cloth instead:

If you’re planning to stain the wood, using a slightly damp rag is OK. Getting the wood wet will open up the wood after sanding, which can help it accept the stain a little better.
But I prefer not to use anything wet, because it can make the imperfections pop up again. Sometimes it happens, sometimes it doesn’t…but on more porous wood like this one I didn’t want to take a chance.
3. Choose your protectant
I wanted to keep the natural look of the wood so I wasn’t going to stain this piece. This is how the table looked after the sanding and cleaning:

My absolute favorite way to treat most wood projects is with Tung oil. I’ve shared how I’ve treated our butcher block counter with Tung oil and it’s held up beautifully for years!
I use polyurethane on surfaces that don’t get as much wear and tear — like shelves or built ins. On tables and counters I much prefer the natural finish and look of Tung oil. It gives you the durability of other varnishes, but also really brings out the natural color of the wood.
Over the years, I’ve used both pure Tung oil and a “finish” version that has some additives, and both hold up beautifully. Pure Tung oil has no additives, but takes longer to dry.
There are SO many benefits of Tung oil:
- The finish doesn’t yellow or darken over time.
- It gives a natural sheen to the wood finish. I find glossy polyurethanes show scratches and scrapes more.
- Tung oil is eco-friendly and made with crushed seeds from Tung tree nuts.
- Pure Tung oil is food safe and non toxic. You can use pure oil on cutting boards, utensils or wood bowls. (Let it cure before using.)
- It’s easy to apply with just a soft cloth.
4. Applying Tung oil
I use a foam brush when applying polyurethane coats, but Tung oil is even easier!
Just pour it on the surface and wipe it in with a lint free rag, with the wood’s grain:

I recommend wearing gloves during the application!
- Use a generous amount and wipe it into the wood. You’ll see the results instantly!
- Wait 10-15 minutes and then use a clean rag to wipe up and excess and buff the surface (rub the oil into the wood).
- You can do a light sanding with a fine steel wool in between coats, but if you prepped well, that isn’t necessary most of the time.
Dry times can vary based on the humidity and product you use. Pure Tung oil can take two to three days to dry, but Tung oil finishes that are a blend only take 24 hours, sometimes less.
5. Add enough coats
The directions always call for numerous coats, but on some pieces I find that’s not necessary. I only do one (maybe two) when I retouch our island every year or so, and that holds up great.
More porous wood (large pores in the wood) like our table soaks in whatever you apply, so more coats are necessary.
Our maple counters on the island are not as porous and only take one coat.
I can tell just by looking if I need to add more after the first coat. Use the light and look at the surface at an angle:

See the shinier parts? That’s where the finish covered well. The matte areas are wood that absorbed the oil and still needs more coats.
In total I applied three coats and because I wasn’t using pure Tung oil, it took less than a day to dry between coats.
The result is a water resistant table with a gorgeous satin finish. Like most protective products, it enhances the look of the wood:

My final coat was pretty darn smooth, but as a finishing touch I like to go over it quickly with a piece of paper bag or kraft paper:

It’s amazing how just that paper will knock down the tiniest imperfections and leave you with a perfectly smooth finish!
The best part is that the Tung oil doesn’t allow moisture to penetrate the wood:

That’s why I love it for the butcher block around our sink!
Our wood table is a richer tone now…you can really see the variations and warmth of the wood:
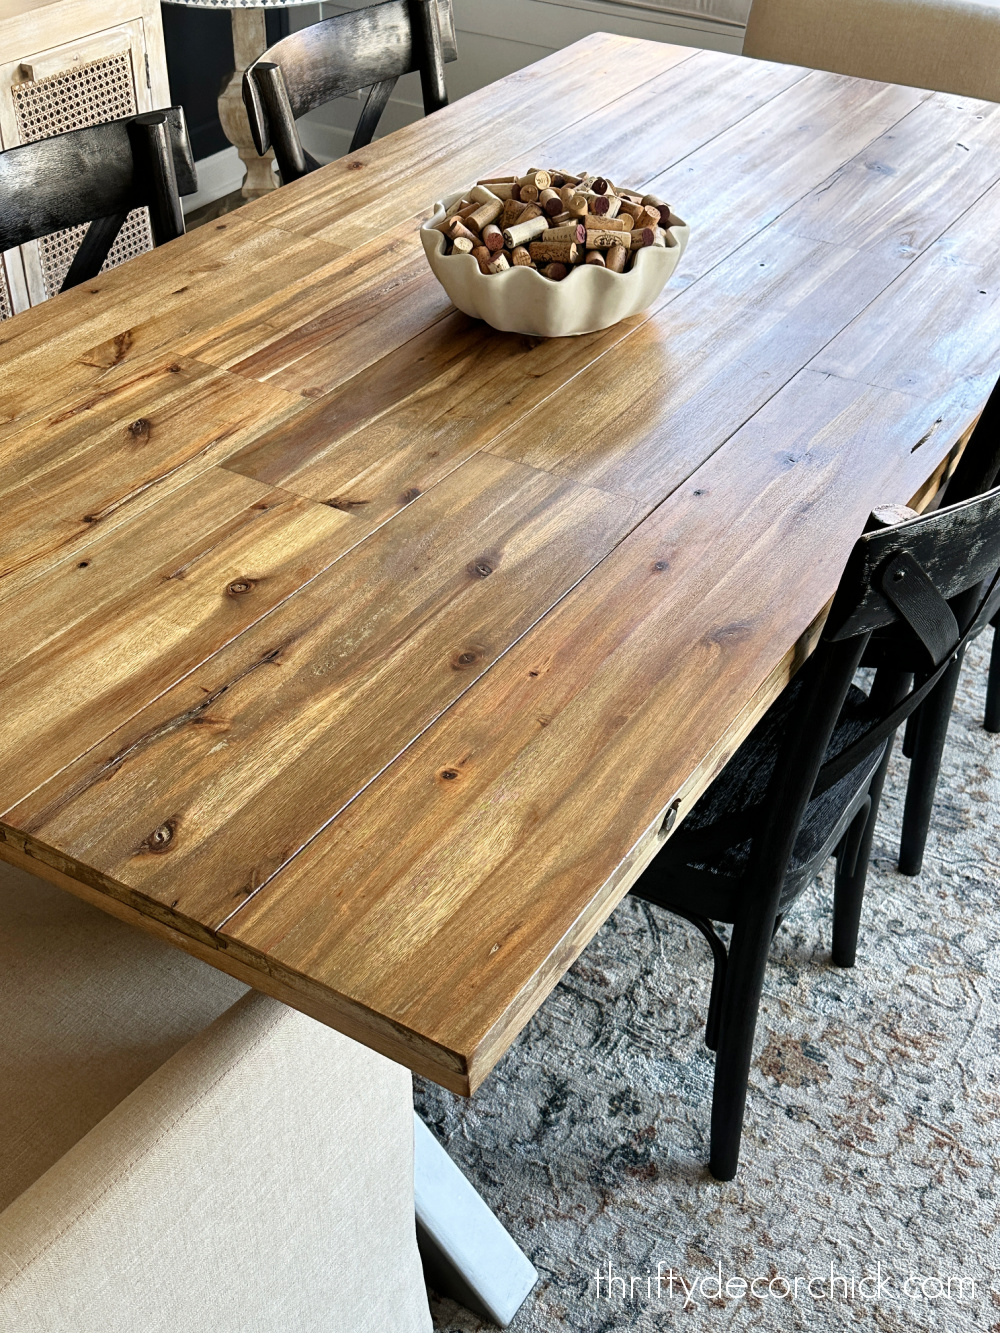
We LOVE it!
Here’s a reminder of how it looked before:


All of the stains are gone and we now have a beautiful wood tabletop!
Our wood dining chairs used to be the same lighter wood as the table, but I spray painted them black a couple years ago. We love the contrast:
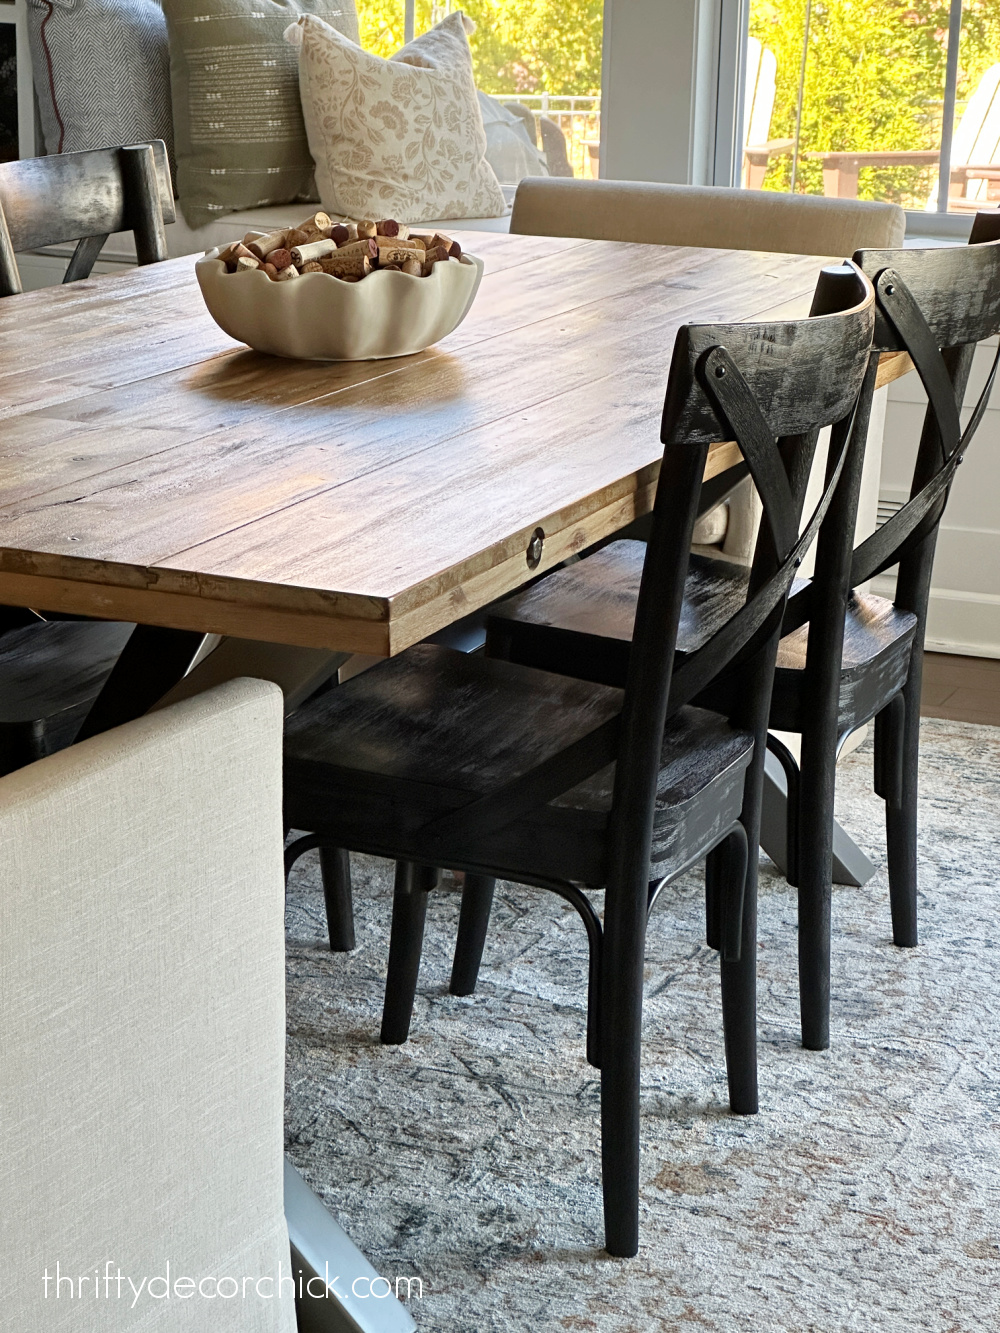
We replaced the tall parson’s chairs at the ends with these lower upholstered dining chairs, also from World Market. The cats kept playing on the taller chairs and knocking them over. 🙂
The new chairs are SO comfy! I love the more causal look for this space:

Now the cats curl up together and cuddle in them instead of climbing all over! 😉 Well…for the most part.

This refinishing tutorial will work for any wood furniture piece. It will get rid of the water spots and prevent them from coming back!
Have you used Tung oil on any wood surfaces in your home?
Never miss a post by signing up to get posts via email.
